So you want to join a linky party but.....
You are not sure how.
Hey there, everyone!!! This is Anne from Calamity Anne's Adventures!Debbie approached me earlier this week to see if I'd like to do a tutorial for her newbies on how to link up to a Linky Party.....without hesitation.....I said absolutely! I don't know about you, but I love a challenge.....and this seemed right up my alley. I remember my first Linky Party that I did ages upon ages ago.....and yes, it came across as quite intimidating.....but, once you've done a couple of them, you'll start wondering why you ever thought it was so darn difficult. Enough of my chattering.....something I love to do, by the way.....and let's get to this tutorial!
Oops.....before I forget.....when you link up to a Linky Party, take the time to thank the hostess for hosting the party.....that's just a nice touch on your part!
How To Link Up To A Linky Party
There are two types of Linky Parties that you’ll come across. The first one is a Basic Linky, where you have just the title of your project, and the link back to your post. The second one, which in my opinion is the snazziest, is the Thumbnail Linky, where there are a collection of thumbnail photos along with the project name. For today’s tutorial, I’m giving you the directions on how to do a Thumbnail Linky (the Basic Linky is the same process, except it lacks a photo).
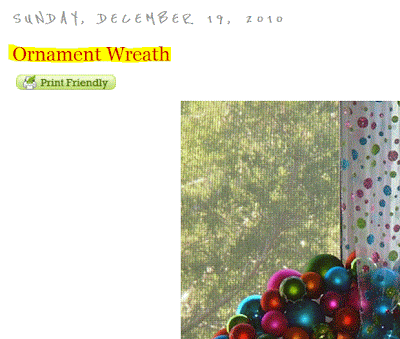
The first thing you need to do is to have your project that you want to link up already posted on your blog. Here's an example of the project that I'm going to link up for you today.
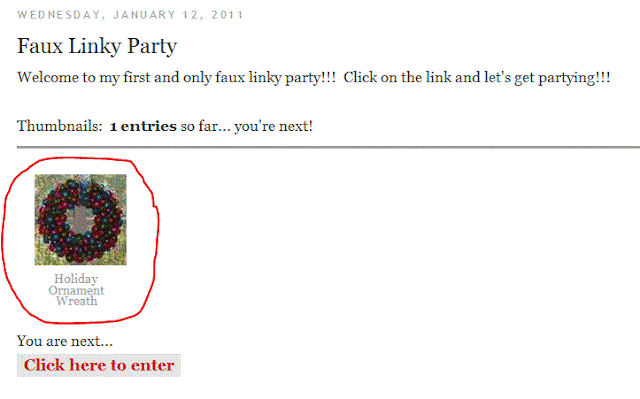
So now you’re wanting to join a Linky Party and link up your project. As an example, here’s the party that I’d like to link the Ornament Wreath up to. At the bottom of the Linky Party post, you will find “You are next… Click here to enter.” Click on Click here to enter…
You are now taken to the page below where you will sign up your project for the Linky Party…
Line 1 is where you will link up your project. To find the information to enter into Line 1, you will need to go back to your blog, and click on the post’s title for your project. In the example below, I need to click on where it says Ornament Wreath (the title of my project)…
Once you’ve clicked on the post’s title, a new screen pops up with the URL for your project. The URL is found at the top of your page. All you need to do is right-click on the URL and click on copy…
Take the copied URL and paste it (CTRL V) into Line 1…
On Line 2, all you need to do here is give your project a title. Please notice the amount of character spaces you have available. This particular linky party only allows 25 characters maximum. I decided to name my project Ornament Wreath…
Line 3, asks for your email address. Adding it is strictly optional…..but it’s nice to include it so the Linky Party hostess/host can contact you if they so desire.
Now you can add a photo of your project on Line 4. You are given two options where to locate your photo…..From File (which is stored on your computer)…..or From Web (which would be from your blog). Personally, I choose to locate a photo From Web, because I find the clarity of the photo much sharper (but that’s a personal opinion). For this tutorial, I am selecting From Web. Click on From Web…
The screen that pops up shows all the photos you used for your project post. The one that I want to use for the Linky Party is of the wreath itself. Click on your photo…
Depending on the Linky Party, you may be asked if you want to crop your photo of not. I suggest always taking the opportunity to crop the photo, so it looks exactly the way you want it (we’ve all seen those photos that make you go hmmm, because they didn’t crop it properly). Please get in the habit of cropping…..you’ll be very pleased in the long run!
So here’s your opportunity to crop your photo. Don’t worry about all the crap off to the left side…..just concern yourself with the photo. Either click and hold on top of the photo, or click and hold on one of the little boxes that are in each of the corners of the photo…..then move the box up or down to capture exactly what you want to show of your project. Easy, isn’t it!
Here’s the end result of cropping my photo. I like how the wreath is centered…with that done, then click on OK…
You will now be taken to back to the Linky Party, and you will now see your link up. (For those of you with an eagle eye...yes, I renamed the project to Holiday Ornament Wreath.....sometimes a gal's got to do, what a gal's got to do)!
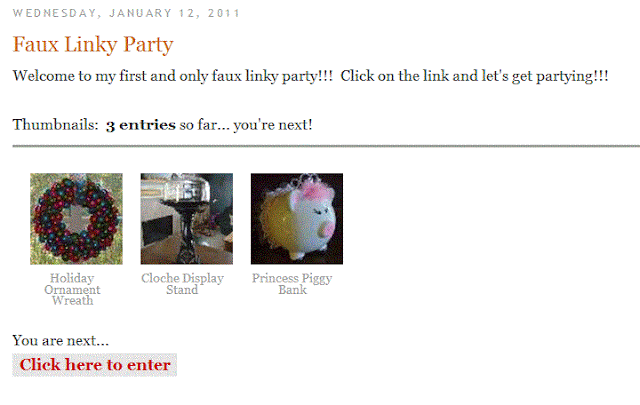
Just for grins…..here’s the Linky Party with several projects shown…
That’s it…..easy as can be!!!
If you have any questions, please feel free to contact me at calamityanne@gmail.com.
Thanks Anne, that was great!
--
Labels: Blog featured


15 Comments:
Dearest Debbie,
Just wanted to stop by to say hello and to remind you of my 925/000 silver angel giveaway till January 25th. To the right at the top of my blog is the button that gets you straight to it...
Good luck and have a fabulous week!
Mariette
Thanks for the valuable information...Its something interesting
http://craftaworld.blogspot.com/
Love
Farah
I always make a habit to comment on the linky post in front of and behind the one I add to the party. I let them know I found them at such and such party.
Thanks so much for doing this. I am not a newbie but I kind of have my own little "routine"..and I have never done a linky party before. Now I know that I could do one if I choose to..thanks so much- Hugs-Diana
Another great tutorial by Calamity Anne! Thanks, Anne -- and thanks to Debbie for featuring Anne's great, detailed instructions!
Best,
Gloria
Wow, I just learned so much in reading just one post! I may have to print out the instructions through.. so I remember it all. :-) Thanks Debbie!! Have a Wonderful week!!!!
HUGS & 'Smiles', :-)
Coreen
I hope your newbies can get good use out of this tutorial!!!
Thanks for inviting me to share my tutorial on your blog, Debbie!
I know this will help a lot of people!
This is another helpful post! Thanks to both of you ladies...let the party begin!!
Angela
http://amcinnisartworks.blogspot.com
Way to go Debbie! Great info and tute by Anne :D
***If your new and ready to link to a party, there is one going on now at Amaze Me Monday Blog Party
You ARE a Party girl!
I think I am a follower, I tried to check, but google wouldn't let me.
I will go check on my dashboard and come back if I am not.
So many parties, so few ideas! :)
All this snow is freezing my brain!
:) Great job! I love the tutorial!
Very nice instructions, Debbie! I'm sure this will be very helpful for new bloggers.
Debbie, this is awesome! I tried to link up once and all that happened was the pic of my project came up with my full name (needless to say I wasn't the project!). And it wouldn't go back to my post. Embarrassing. :/
I love this whole thing 'newbie/we need help' project you're doing - it's a great idea for all us little people out here in Blogland!
~Kori
Debbie, thanks for asking Anne to do this tutorial. Anne, I was wondering how I was going to find some instructions for "linking" and there you were right on Debbies Blog. you make it sound so simple, now if I can follow through! Thanks so much Debbie and Anne, I'm really needing all the "how toos" I can get. Hope to see you Monday. Hugs, Maki at Maki's Little Red House
Post a Comment
Subscribe to Post Comments [Atom]
<< Home